For help contact Unisoft and we can go online with you.
Important: Much of the populating of database tables when setting up CELLS Workflow is done using the CELLS Route Builder which provides a natural way to populate the NEXT_STEP, DEFECTS, DOCUMENTS, etc. tables by using a spreadsheet.
Using the CELLS Route Builder you can enter data according to the flow of the process being described rather than entering data directly into the NEXT_STEP table in a fragmented, out-of-order manner.
It is recommended that you use the CELLS Route Builder when creating new processes for CELLS Workflow.
The information in this manual below is for reference and provides alternate means of populating the database tables and other information that maybe useful. Again it is recommended to use the "CELLS Route Builder" when setting up a new process for CELLS Workflow. Link to the CELLS-Route-Builder.
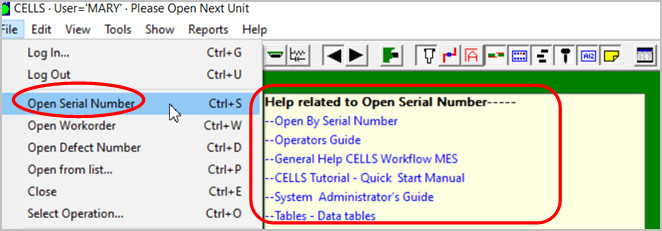
Note: The CELLS Workflow MES has HELP for most menu items by hovering over the menu item for a second then click any of the videos, manual or website links.
Related links:
This appendix provides you with the information you need to create a database if you choose not to use the sample database, cell32.mdb.
As with any database, you start by writing a plan for the operations you want the database to control. You can do this by outlining the process in a flowchart or outline. After planning your database, you can then create the tables you need to function with the CELLS software.
Six operations need to be defined in the Operations table. The operations are:
| $START | Where the unit was before in the process. This is the first step defined. |
| $DONE | Where the unit will go when it passes. This is the last step defined. |
| $SCRAP | Where the unit is sent when it cannot be repaired. |
| $ALL | This is not an operation; this will be used later when defects are generated. |
| $SERIALIZE | Used internally when the unit transitions from an un-serialized unit to a serialized unit. |
| $ANYTIME | Advanced — roving inspections. |
Note: The $ (dollar sign) must always appear in front of the name, otherwise the system will fail to operate.
| Field | Data Type | Field Size | Required | Indexed |
|---|---|---|---|---|
| OPERATION_ID * | Text | 50 | No | Yes (No Duplicates) |
| OPERATION_DESC | Text | 255 | No | No |
| YN_WORK_ORDER_ID | Text | 1 | Yes | Yes (Duplicates OK) |
| YN_SERIAL_NO | Text | 1 | Yes | No |
| * Primary Key. | ||||
Follow steps 7-12 in the Operations Table instructions to create the Defects table. Type the fields and select the following field properties to create the table:
| Field | Data Type | Field Size | Required | Indexed |
|---|---|---|---|---|
| DEFECT_ID * | Text | 50 | No | Yes (No Duplicates) |
| DEFECT_DESC | Text | 255 | No | No |
| ENABLE_REFDES | Yes/No | No | No | |
| ENABLE_OTHER_ID | Yes/No | No | No | |
| SHOW_ID | Yes/No | No | No | |
| * Primary Key. | ||||
Save the table as DEFECTS.
Follow steps 7-12 in the Operations Table instructions to create the Data Items table. Type the fields and select the following field properties to create the table:
| Field | Data Type | Field Size | Required | Indexed |
|---|---|---|---|---|
| DATUM_ID * | Text | 50 | No | Yes (No Duplicates) |
| DATUM_DESC | Text | 50 | No | No |
| DATUM_TYPE | Text | 50 | No | No |
| DATUM_MIN | Text | 50 | No | No |
| DATUM_MAX | Text | 50 | No | No |
| DATUM_MIN_LEN | Text | 50 | No | No |
| DATUM_MAX_LEN | Text | 50 | No | No |
| LIST_ID | Text | 50 | No | Yes (Duplicates OK) |
| * Primary Key. | ||||
Save the table as DATA_ITEMS.
Follow steps 7-12 in the Operations Table instructions to create the Data Items table. Type the fields and select the following field properties to create the table:
| Field | Data Type | Field Size | Required | Indexed |
|---|---|---|---|---|
| CONDITION_ID * | Text | 50 | Yes | Yes (No Duplicates) |
| CONDITION_DESC | Text | 50 | No | No |
| * Primary Key. | ||||
Save the table as CONDITIONS.
Follow steps 7-12 in the Operations Table instructions to create the Data Items table. Type the fields and select the following field properties to create the table:
| Field | Data Type | Field Size | Required | Indexed |
|---|---|---|---|---|
| USER_ID * | Text | 50 | Yes | Yes (No Duplicates) |
| USER_NAME | Text | 50 | No | No |
| PASSWORD ** | Text | 50 | Yes | No |
| ENABLE_FLAG | Text | 1 | No | No |
| USER_GROUP | Text | 50 | No | No |
| * Primary Key. ** Select Yes in the Allow Zero Length area. | ||||
Save the table as USERS.
Follow steps 7-12 in the Operations Table instructions to create the Data Items table. Type the fields and select the following field properties to create the table:
| Field | Data Type | Field Size | Required | Indexed |
|---|---|---|---|---|
| STATION_ID * | Text | 50 | Yes | Yes (No Duplicates) |
| STATION_DESC | Text | 50 | No | No |
| ENABLE_FLAG | Text | 50 | No | No |
| * Primary Key. | ||||
Save the table as STATIONS.
Follow steps 7-12 in the Operations Table instructions to create the Data Items table. Type the fields and select the following field properties to create the table:
| Field | Data Type | Field Size | Required | Indexed |
|---|---|---|---|---|
| PROCESS_ID * | Text | 50 | No | Yes (No Duplicates) |
| PROCESS_DESC | Text | 50 | No | No |
| STARTING_STEP_ID | Text | 50 | No | Yes (Duplicates OK) |
| * Primary Key. | ||||
Save the table as PROCESSES.
Follow steps 7-12 in the Operations Table instructions to create the Data Items table. Type the fields and select the following field properties to create the table:
| Field | Data Type | Field Size | Required | Indexed |
|---|---|---|---|---|
| ASSY_ID * | Text | 255 | Yes | Yes (No Duplicates) |
| BOARD_FILE | Text | 254 | Yes | No |
| PROCESS_ID | Text | 50 | No | No |
| SERIALNO_PATTERN | Text | 64 | No | No |
| WORKORDER_PATTERN | Text | 64 | No | No |
| * Primary Key. | ||||
Save the table as ASSY.
Follow steps 7-12 in the Operations Table instructions to create the Data Items table. Type the fields and select the following field properties to create the table:
| Field | Data Type | Field Size | Required | Indexed |
|---|---|---|---|---|
| OPERATION_ID * | Text | 50 | Yes | Yes (Duplicates OK) |
| DEFECT_ID * | Text | 50 | Yes | No |
| ENABLE_FLAG | Text | 50 | Yes | No |
| * Primary Key. | ||||
Save the table as OPERATION_DEFECTS.
Follow steps 7-12 in the Operations Table instructions to create the Data Items table. Type the fields and select the following field properties to create the table:
| Field | Data Type | Field Size | Required | Indexed |
|---|---|---|---|---|
| ID * | AutoNumber | Long Integer | Yes (No Duplicates) |
|
| PROCESS_ID | Text | 50 | No | Yes (Duplicates OK) |
| OPERATION_ID | Text | 50 | No | Yes (Duplicates OK) |
| DATUM_ID | Text | 50 | No | Yes (Duplicates OK) |
| SUB_LOCATION | Text | 50 | No | Yes (Duplicates OK) |
| YN_REQUIRED | Text | 50 | No | No |
| SORT_ORDER | Text | 50 | No | No |
| * Primary Key. | ||||
Save the table as DATA_ENTRY.
Follow steps 7-12 in the Operations Table instructions to create the Data Items table. Type the fields and select the following field properties to create the table:
| Field | Data Type | Field Size | Required | Indexed |
|---|---|---|---|---|
| PROCESS_ID * | Text | 50 | No | Yes (Duplicates OK) |
| OPERATION_ID * | Text | 50 | No | Yes (Duplicates OK) |
| CONDITION_ID * | Text | 50 | No | Yes (Duplicates OK) |
| YN_DEFAULT | Text | 50 | No | No |
| SORT_ORDER | Text | 50 | No | No |
| YN_DEFECT_REQ | Text | 50 | No | No |
| NEXT_OPERATION_TYPE | Text | 50 | No | No |
| NEXT_OPERATION_ID | Text | 50 | No | No |
| * Primary Keys. | ||||
Save the table as NEXT_STEP.
Follow steps 7-12 in the Operations Table instructions to create the Data Items table. Type the fields and select the following field properties to create the table:
| Field | Data Type | Field Size | Required | Indexed |
|---|---|---|---|---|
| WORK_ORDER_ID * | Text | 255 | No | Yes (No Duplicates) |
| WORK_ORDER_DATE | Date/Time | No | No | |
| WORK_ORDER_QTY ID ** | Number | Long Integer | No | No |
| SERIAL_NO_MIN | Text | 255 | Yes | No |
| SERIAL_NO_MAX | Text | 255 | No | No |
| ASSY_ID | Text | 255 | Yes | Yes (Duplicates OK) |
| SALES_ORDER_ID | Text | 255 | No | No |
| PROCESS_ID | Text | 50 | No | No |
| BOM_ID | Text | 50 | No | Yes (Duplicates OK) |
| BOM_REV | Text | 50 | No | No |
| * Primary Key. ** Decimal Places: Auto; Default Value: 0. | ||||
Save the table as WORKORDERS.
Follow steps 7-12 in the Operations Table instructions to create the Data Items table. Type the fields and select the following field properties to create the table:
| Field | Data Type | Field Size | Required | Indexed |
|---|---|---|---|---|
| ASSY_ID | Text | 255 | Yes | Yes (Duplicates OK) |
| APPLIES_TO | Text | 254 | No | No |
| MENU_TEXT | Text | 254 | Yes | No |
| URL | Text | 254 | Yes | No |
| OPERATION_ID | Text | 50 | No | Yes (Duplicates OK) |
| MENU_SORT | Text | 50 | No | No |
| YN_DEFAULT | Text | 50 | No | No |
| No Primary Key. | ||||
Save the table as DOCUMENTS.
Follow steps 7-12 in the Operations Table instructions to create the Data Items table. Type the fields and select the following field properties to create the table:
| Field | Data Type | Field Size | Required | Indexed |
|---|---|---|---|---|
| ID *, # | AutoNumber | Long Integer | Yes (No Duplicates) |
|
| DATE_TIME | Date/Time | No | No | |
| WORK_ORDER_ID | Text | 255 | No | Yes (Duplicates OK) |
| QUANTITY ID ** | Number | Long Integer | No | No |
| SERIAL_NO ## | Text | 255 | No | Yes (Duplicates OK) |
| ASSY_ID | Text | 50 | No | Yes (Duplicates OK) |
| STATION_ID | Text | 50 | No | No |
| USER_ID | Text | 50 | No | No |
| OPERATION_ID | Text | 50 | No | No |
| CONDITION_ID | Text | 50 | No | Yes (Duplicates OK) |
| EVENT_ID | Text | 50 | No | Yes (Duplicates OK) |
| DEFECT_ID | Text | 50 | No | Yes (Duplicates OK) |
| REF1 | Text | 50 | No | No |
| REF1_CUST_PART_NO | Text | 50 | No | No |
| REF1_MFG_PART_NO | Text | 50 | No | No |
| REF1_DESC | Text | 50 | No | No |
| REF2 | Text | 50 | No | No |
| REF2_CUST_PART_NO | Text | 50 | No | No |
| REF2_MFG_PART_NO | Text | 50 | No | No |
| REF2_DESC | Text | 50 | No | No |
| OTHER_ID | Text | 50 | No | No |
| REMARKS | Memo | No | No | |
| * Primary Key. ** Decimal Places: Auto; Default Value: 0. # New Values — Increments. ## Allow Zero Length — Yes. | ||||
Save the table as HISTORY.